

How to Uninstall GeForce Experience?
Method 1: Uninstall GeForce Experience via Control Panel
The normal way to remove a program from your computer is to use the Control Panel. You can also use this method to uninstall NVIDIA GeForce Experience. Here is a guide:
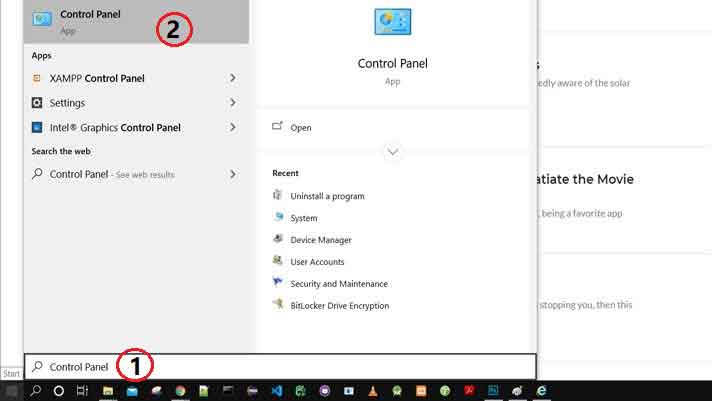
- Click the search box and input control panel.
- Select the first search result to open Control Panel.
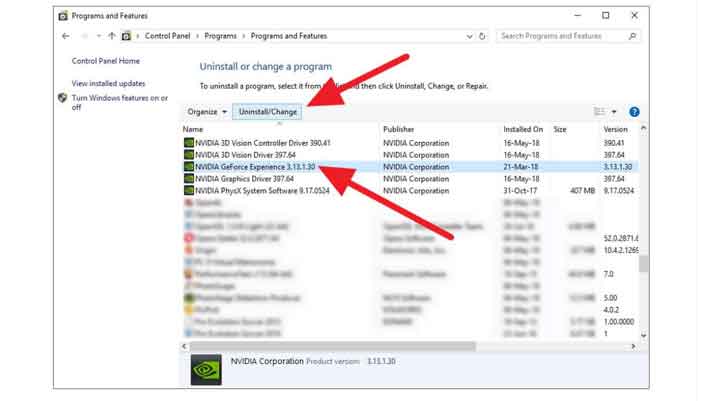
- Click Programs and Features.
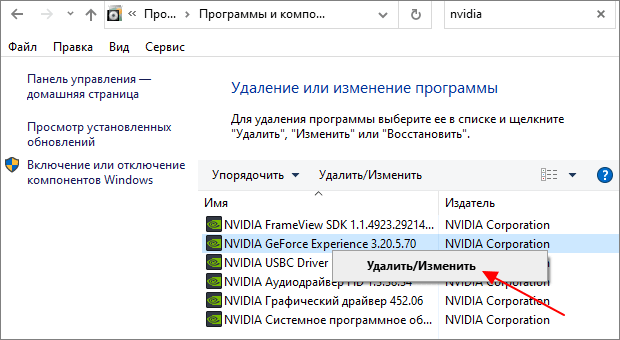
- You will access the Uninstall or change a program interface where you can see all the applications that you have installed on your computer. Then, you need to scroll down to find the NVIDIA GeForce Experience application.
- Right-click on NVIDIA GeForce Experience and then select Uninstall from the pop-out menu.
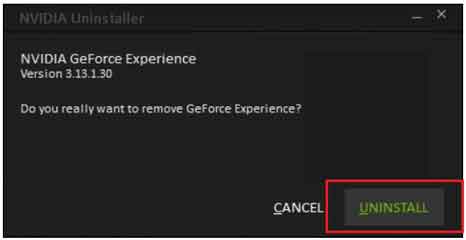
Windows will begin to uninstall NVIDIA GeForce Experience. You need to follow the on-screen wizard to confirm the uninstallation operation and then wait until the whole installation process ends.
Method 2: Uninstall GeForce Experience via Apps & Features
- Click the search box and type add or remove programs.
- Select the first search result and you will directly Apps & features.
- Scroll the list of the programs and find NVIDIA GeForce Experience.
- Click it and select Uninstall to remove NVIDIA GeForce Experience from your computer.
However, if this method doesn’t work for you, you can try the next method.
Method 3: Uninstall GeForce Experience in the Installation Directory
You need to open the installation directory of GeForce Experience and then find the file that is named as uninstall.exe. Then, you can click it to uninstall GeForce Experience.
Method 4: Uninstall GeForce Experience via System Restore
You can also perform a system restore to revert your computer to a point when GeForce Experience was not installed on your computer. However, this method may cause some data loss issues. You can read this article to know what you should do when you want to perform a system restore: What Is System Restore Point and How to Create It?
Method 5: Install and Uninstall GeForce Experience
If all the above methods don’t work for a GeForce Experience uninstallation, you can try the following steps to complete the work:
- Open File Explorer.
- Go to C:\Program Files (x86)\NVIDIA Corporation\.
- Find and delete the folder that is named as GeForce Experience.
- Go to the NVIDIA official site to download the latest version of GeForce Experience. Then, you need to install it on your computer.
- You can try the first four methods to uninstall NVIDIA GeForce Experience. This time, the operation should be effective.
Как запустить GeForce Experience
Если после установки пользователь задается вопросом, как открыть Nvidia GeForce Experience, то следующие инструкции именно для него. У большинства юзеров не возникает подобных проблем. Для запуска программы нужно всего лишь щелкнуть по значку на рабочем столе (после установки создается иконка приложения).
Если программа все же не открывается, нужно искать пути решения проблемы:
- Необходимо проверить активность служб Nvidia Geforce Experience в консоли управления Windows. Если служба существует, но остановлена, то перезапустить её. Если значение автозапуска установлено «Вручную», изменить на «Автоматический» и перезагрузить систему. После этого повторить попытку запуска программы.
- Следующая потенциальная причина, из-за которой может возникнуть проблема с запуском, – это недостаточное количество свободной оперативной памяти (RAM). В этом случае поможет закрытие всех запущенных приложений и фоновых процессов. Рекомендуется также использовать программы для оптимизации памяти ОЗУ, например, WiseMemoryOptimzer.
Failed Install/Uninstall Fix
If you are suffering from a botched installation of GeForce Experience and have encountered the dreaded ”NVIDIA Uninstaller cannot continue” error message, here’s how to remove the utility and reinstall it.
- Click on ”My Computer” from the desktop.
- Navigate to ‘’C:Program Files (x86)NVIDIA CorporationGeForce Experience’’.
- Delete the GeForce Experience folder.
- Visit the NVIDIA website and download the latest version of GeForce Experience here.
- Once downloaded, double click on the executable file and follow the instructions provided by the installation wizard.
Should the installation still fail to complete, follows these steps.
- Click on the Windows Start menu and in the search bar type ‘’msconfig.exe’’.
- Select the ‘’Best Match’’ option called ‘’System Configuration’’.
- In MSConfig, click on the tab called ‘’Services’’.
- Tick the ”Hide all Microsoft services” box at the bottom of the window.
- Below the list of services, click on ‘’Disable all’’.
- In the list, select and enable all NVIDIA services.
- Click on ”Apply,” then ‘’Restart Later’’.
- Follow the uninstall steps in ‘’Classic Uninstall’’ section above.
- Delete the GeForce Experience folder by navigating to Navigate to ‘’C:Program Files (x86)NVIDIA CorporationGeForce Experience’’.
- Restart your PC.
- Download the latest version of GeForce Experience here.
- Follow the installation Wizard.
If the problem persists, you may need to enter Regedit and delete all Windows registry entries linked to GeForce Experience, which will effectively purge all traces of the program from the PC. Improperly editing the registry can severely affect the stability of Windows 10, so seek help from an experienced user before proceeding.
Дополнительно
Несколько сведений, которые могут быть полезны при удалении GeForce Experience.
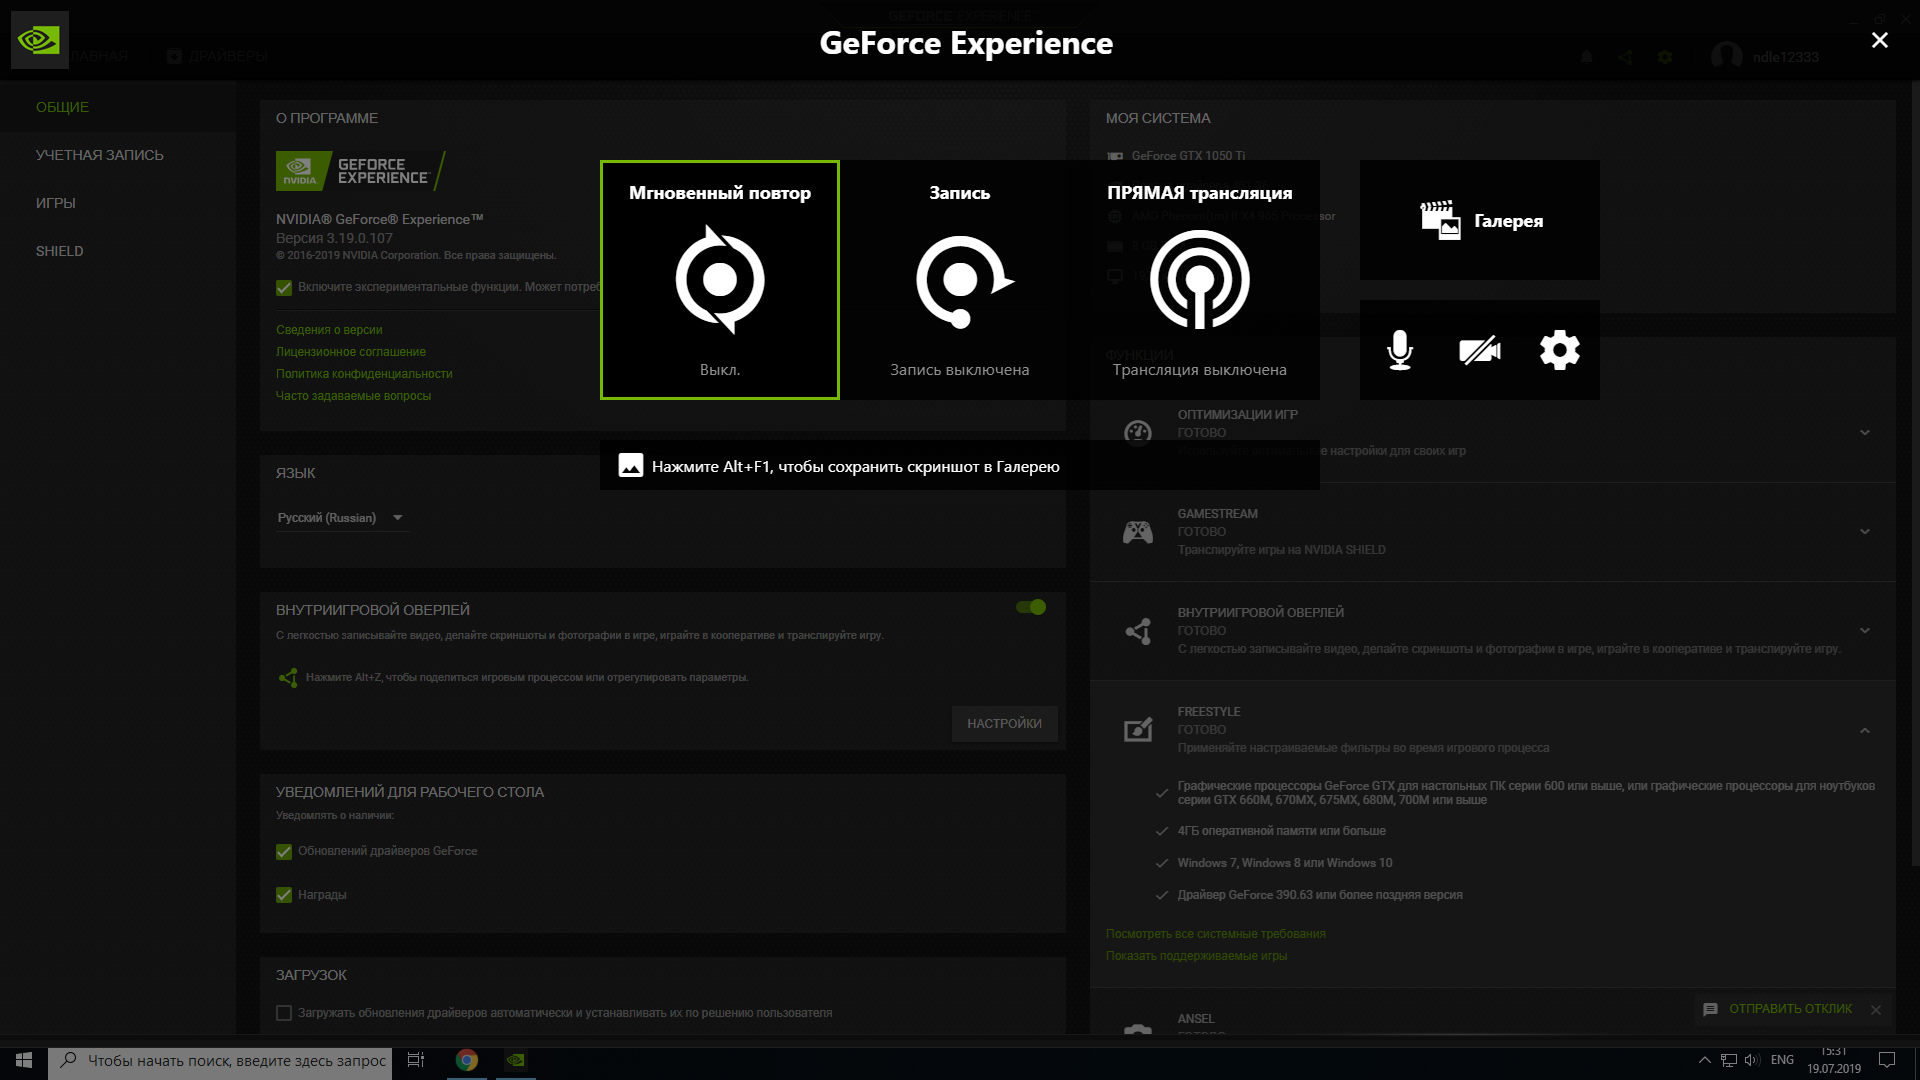
Есть вариант не удалять программу, а просто не давать ей работать
Но важно знать, что в таком случае придется при каждом запуске компьютера вручную выключать GF Exp. Попытка удалить ее из автозагрузки ничем не увенчается – процесс самостоятельно добавляется туда в автоматическом режиме.
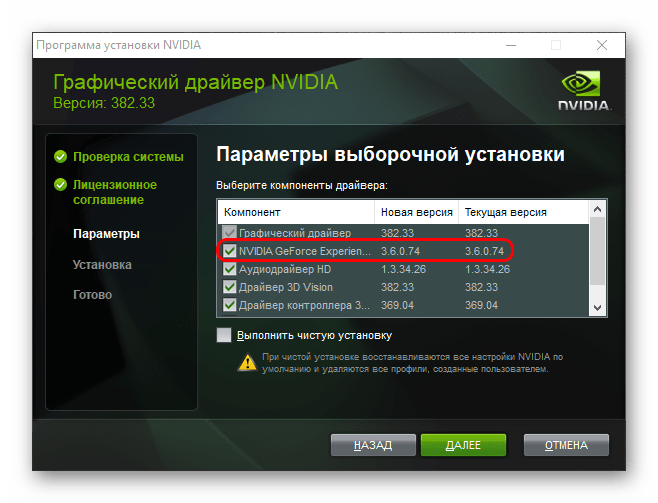
При установке драйверов от NVIDIA установщик также предлагает установить и GeForce Experience
Раньше ПО устанавливалось автоматически, теперь у пользователя есть выбор, можно просто снять соответствующую галочку. Так что следует не забывать об этом, если программа не нужна на компьютере.
Для этого при установке следует выбрать «Выборочная установка», чтобы перейти в режим настройки ПО, которое будет устанавливаться.
Теперь можно видеть пункт об установке NVIDIA GeForce Experience. Остается просто снять галочку, и программа не будет установлена.
Why Do You Want to Uninstall GeForce Experience?
Nothing is perfect all the time. GeForce Experience is not an exception. At times, you can discover that GeForce Experience brings you a bad experience. For example, you may find that GeForce Experience takes much computer resource usage including RAM and processor bandwidth usage. Some of you may don’t like to be interrupted by this software.
Due to the bad user experience, you don’t like to use it and you even want to uninstall NVIDIA GeForce Experience from your Windows 10 computer. But, do you know how to remove GeForce Experience from Windows 10?
In this post, we will show you 5 methods to perform a GeForce Experience uninstallation. You can select one method that is suitable for your actual situation.
How to Uninstall GeForce Experience?
- Uninstall GeForce Experience via Control Panel
- Uninstall GeForce Experience via Apps & features
- Uninstall GeForce Experience in the installation directory of GeForce Experience
- Uninstall GeForce Experience via System Restore
- Install and uninstall GeForce Experience
Удаление GeForce Experience на Windows 7
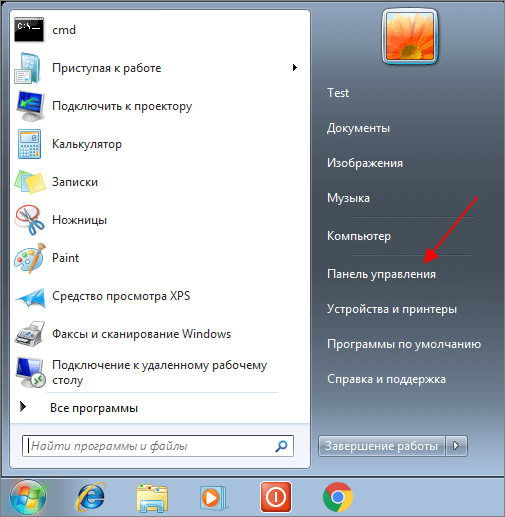
В операционной системе Windows 7 для удаления GeForce Experience нужно использовать «Панель управления». Для этого откройте меню «Пуск» и откройте там «Панель управления».
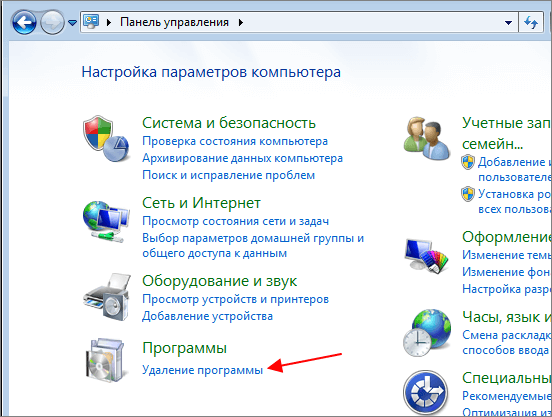
В «Панели управления» нужно перейти в раздел «Программы – Удаление программ». Также данный раздел можно открыть с помощью команды «appwiz.cpl».
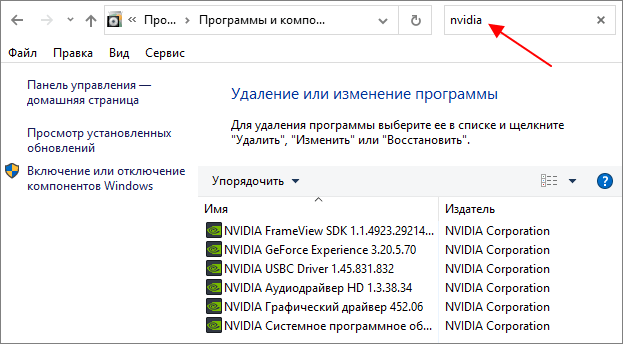
После этого вы увидите список установленных программ. Воспользуйтесь поиском в правом верхнем углу окна для того, чтобы найти все программы связанные с NVIDIA.
Дальше нужно кликнуть правой кнопкой мышки по программе GeForce Experience и выбрать вариант «Удалить / Изменить».
В результате запустится установщик с помощью которого можно удалить GeForce Experience. После завершения удаления перезапустите компьютер.
Как удалить игры из GeForce Experience
Обратите внимание, если вам необходимо удалить игры из GeForce Experience, то удаление и переустановка этой программы не поможет. После повторной установки GeForce Experience все игры снова будут доступны в каталоге
Для удаления игр нужно остановить все сервисы NVIDIA и вручную удалить файлы из папки пользователя.
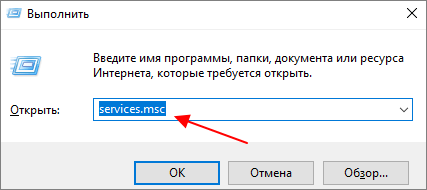
Для этого нажмите комбинацию клавиш Win-R и выполните команду «services.msc».
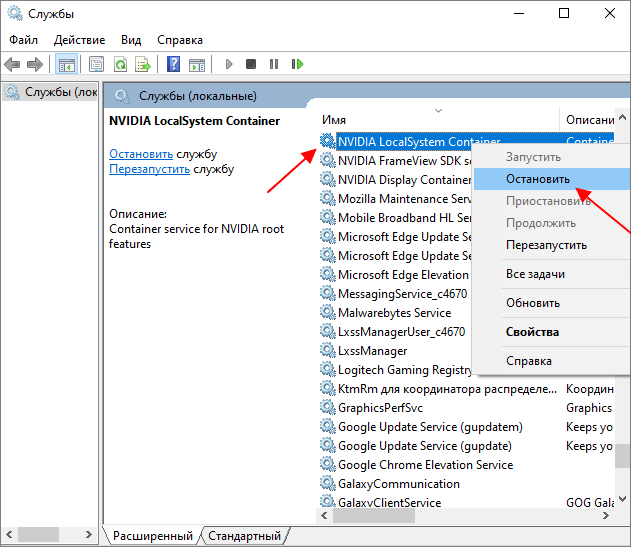
В окне «Службы» нужно остановить все службы связанные с NVIDIA. Для этого кликаем по службе правой кнопкой мышки и выбираем пункт «Остановить». Повторяем это для всех служб NVIDIA.
После этого нужно открыть следующую папку на системном диске:
C:UsersUser_NameAppDataLocalNVIDIANvBackend
И найти там следующие файлы:
- journalBS.jour.dat
- journalBS.jour.dat.bak
- journalBS.main.xml
- journalBS.main.xml.bak
Эти файлы нужно скопировать в другую папку (на случай если они понадобятся для восстановления) и после этого удалить. После удаления файлов перезагрузите компьютер.
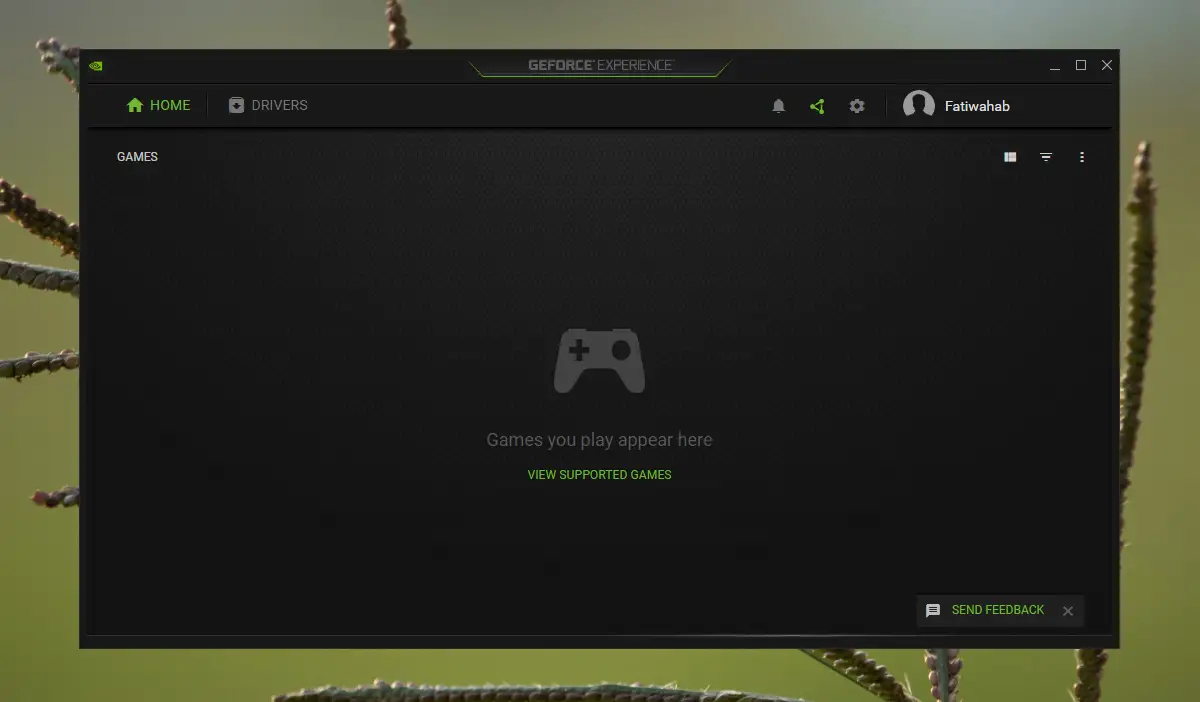
Ways to Disable Nvidia GeForce Experience
If you are not into gaming and do not want GeForce experience to run in the background at startup, you can stop it using simple steps. Stopping Geforce experience from a startup is not that hard. Besides, it’s a recommended step for non-gamers.
![How to uninstall geforce experience [easy guide] - gamingscan](https://kirovlom.ru/wp-content/uploads/e/9/2/e923e742be74395ad561d422f99290db.png)
For Windows 10 and Windows 8:
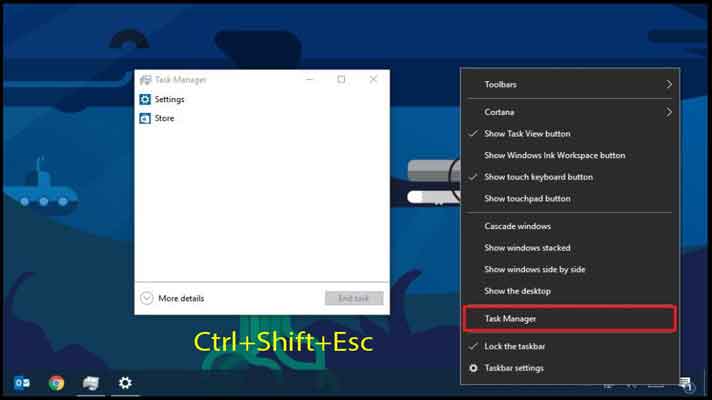
Step 1- Open Taskbar. Shortcut keys are Ctrl+Shift+Esc. Or type it on the search bar.
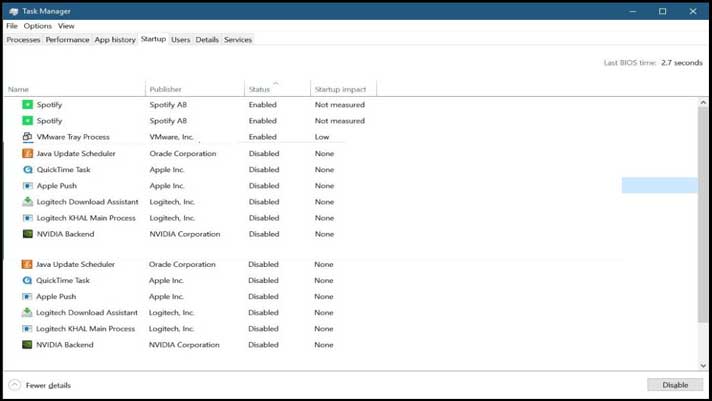
Step 2- After opening a Taskbar, Go to a Startup tab.
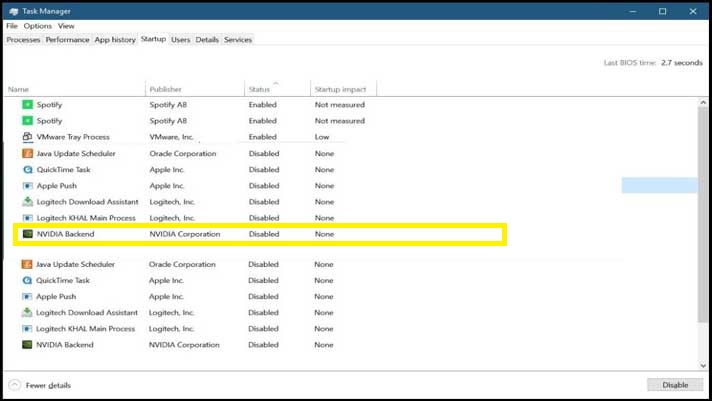
Step 3- Locate the Nvidia GeForce Experience from the list of apps and click on it.
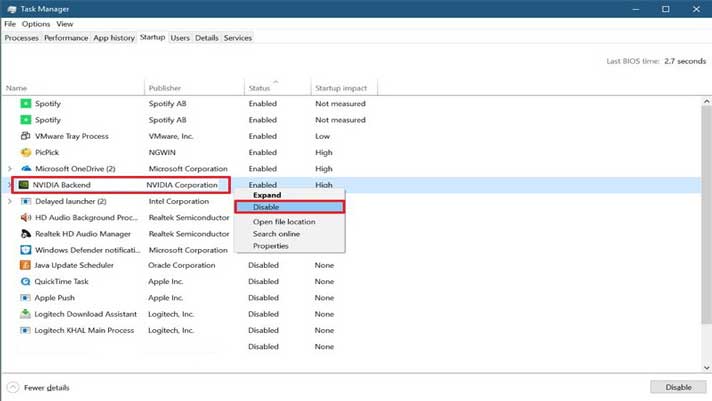
Step 4- Click Disable from a right-bottom corner. Restart the machine
That’s all you need to do to turn off GeForce Experience from Startup.
If you have Windows 7 or Vista, steps are a bit different.
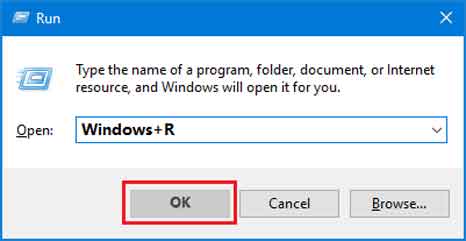
Step 1- Open Run program. Shortcut keys are Windows+R/r.
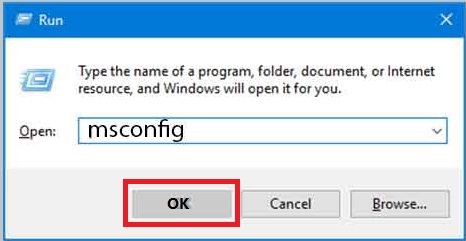
Step2- Type ms config and hit Enter.
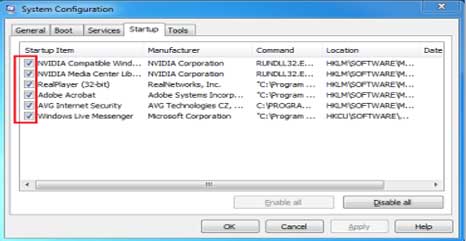
Step 3- Go to the Startup tab to locate GeForce experience
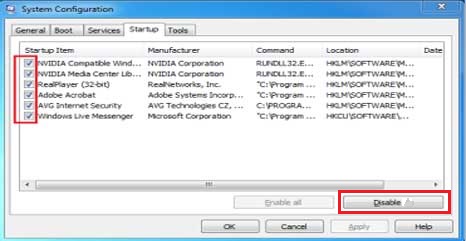
Step 4-Click Disable
Step 5- Restart your machine.
Процесс удаления
Удалить GeForce Experience можно следующими способами.
Способ 1: Стороннее ПО
Для удаления как GF Experience, как и любых других программ, можно использовать всевозможные сторонние программы, которые имеют соответствующую функцию. Например, можно использовать CCleaner.
- В самой программе нужно перейти в раздел «Сервис».

Здесь нас интересует подраздел «Удаление программ». Обычно этот пункт по умолчанию включен. При этом справа появится список всех установленных на компьютере приложений. Здесь следует отыскать «NVIDIA GeForce Experience».

Теперь нужно выбрать эту программу и нажать на кнопку «Деинсталляция» справа от списка.

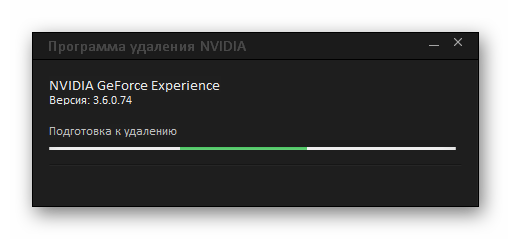
После этого начнется подготовка к удалению.
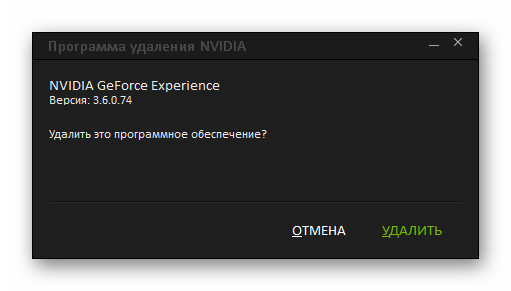
В конце останется только подтвердить, что пользователь согласен избавиться от этой программы.
Преимуществом такого подхода является дополнительный функционал подобных программ. Например, CCleaner после удаления предложит очистить оставшиеся от ПО ненужные файлы, что является более эффективным способом удаления.
Способ 2: Стандартное удаление
Обыкновенная процедура, которая обычно не доставляет никаких проблем.
- Для этого нужно отправиться в «Параметры» системы. Лучше всего это делать через «Этот компьютер». Здесь в шапке окна можно увидеть кнопку «Удалить или изменить программу».

После ее нажатия система автоматически откроет раздел «Параметров», где производится удаление всех установленных программ. Здесь следует отыскать GeForce Experience.

После нажатия на этот вариант появится кнопка «Удалить».

Остается выбрать этот пункт, после чего необходимо подтвердить удаление программы.
После этого программа будет удалена. В более ранних версиях обычно весь пакет ПО от NVIDIA был связан и удаление GF Exp влекло за собой удаление и драйверов. Сегодня такой проблемы нет, так что все остальное программное обеспечение должно остаться на месте.
Способ 3: Удаление через «Пуск»
Точно так же можно сделать, используя панель «Пуск».
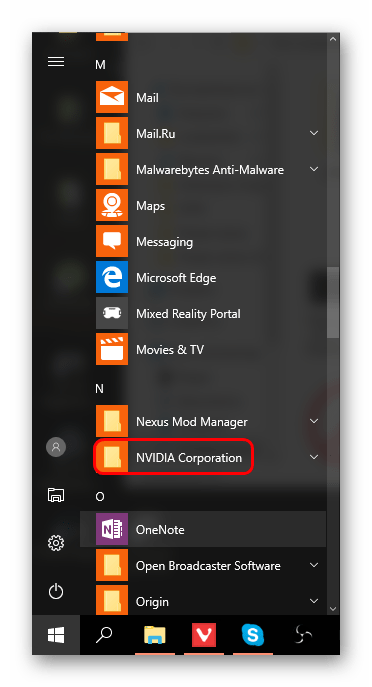
- Здесь следует найти папку «NVIDIA Corporation».
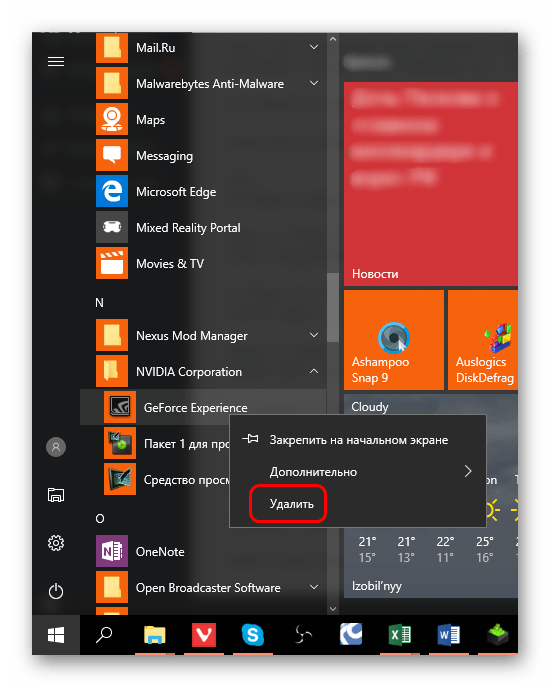
После ее открытия можно увидеть несколько вложений. Самым первым обычно как раз идет GeForce Experience. Нужно щелкнуть на программе правой кнопкой мыши и выбрать вариант «Удалить».
Откроется окно раздела «Программы и компоненты» традиционной «Панели управления», где точно так же нужно найти требуемый вариант. Остается выбрать его и нажать вверху окна вариант «Удалить/изменить программу».

Далее снова нужно следовать указаниям Мастера удаления.
Такой способ может подойти в том случае, если в «Параметрах» данная программа не отображается по тем или иным причинам.
Способ 4: Нестандартный метод
Многие пользователи сталкиваются с тем, что ни в «Параметрах», ни в «Панели управления» процесс удаления не отображает данную программу. В такой ситуации можно пойти нестандартным путем. Обычно в папке с самой программой файла для деинсталляции по какой-то причине нет. Так что можно просто удалить эту папку.
Само собой, предварительно следует завершить процесс выполнения задачи, иначе система будет отказывать в удалении папки с исполняемыми файлами. Для этого следует нажать на иконку программы на панели уведомлений правой кнопкой мыши и выбрать вариант «Выход».
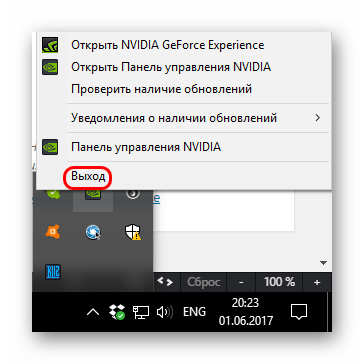
После этого можно удалить папку. Она расположена по пути:
Название у нее соответствующее – «NVIDIA GeForce Experience».
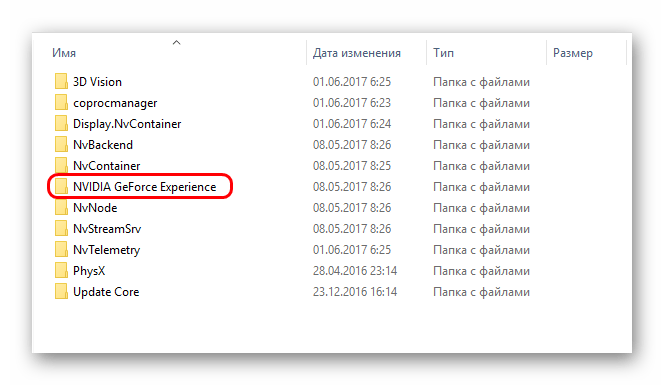
После удаления папки программа перестанет автоматически запускаться при включении компьютера и больше не будет беспокоить пользователя.
Uninstall Nvidia Geforce Experience
Taskbar might not show some of the GeForce drivers or programs in the Startup list. If the specifications of your PC/Laptop are not high-end, keeping GeForce Experience in your machine does not make any sense. Hence, it’s best to uninstall the whole thing.


If you are concerned about the performance of your graphics card, don’t worry, removing GeForce experience won’t affect graphics cards.
Steps to unistall GeForce Experience
Step 1-Type Control panel in the search bar or go to the Start menu to locate the control panel.
Step 2- When you click on it, a list of all installed programs will appear. Locate Geforce Experience.
Step 3-Click Uninstall from the top bar. It will ask for confirmation, hit Uninstall Button.
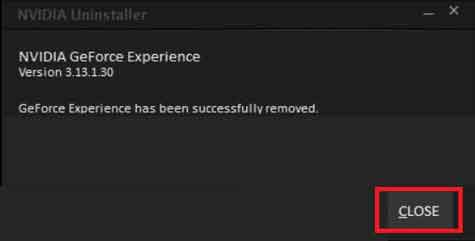
Step 4- Wait till completion of uninstallation, then click on Close
These steps will altogether remove the program from your machine without any harm to a graphics card. All the drivers and features of GPU will work normally. Moreover, you can reinstall the software if at all you need it.
Should You Uninstall GeForce Experience?
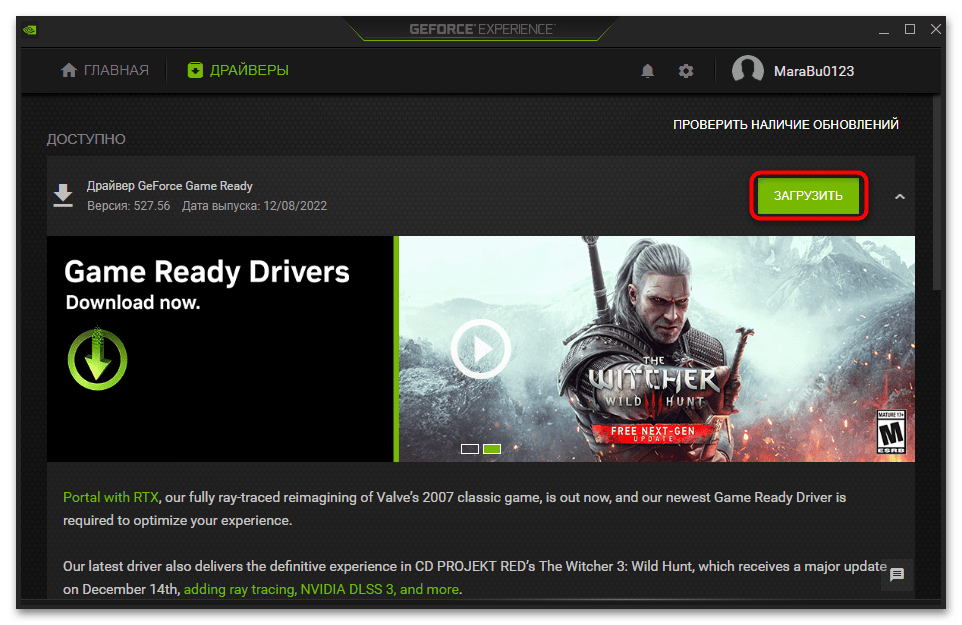
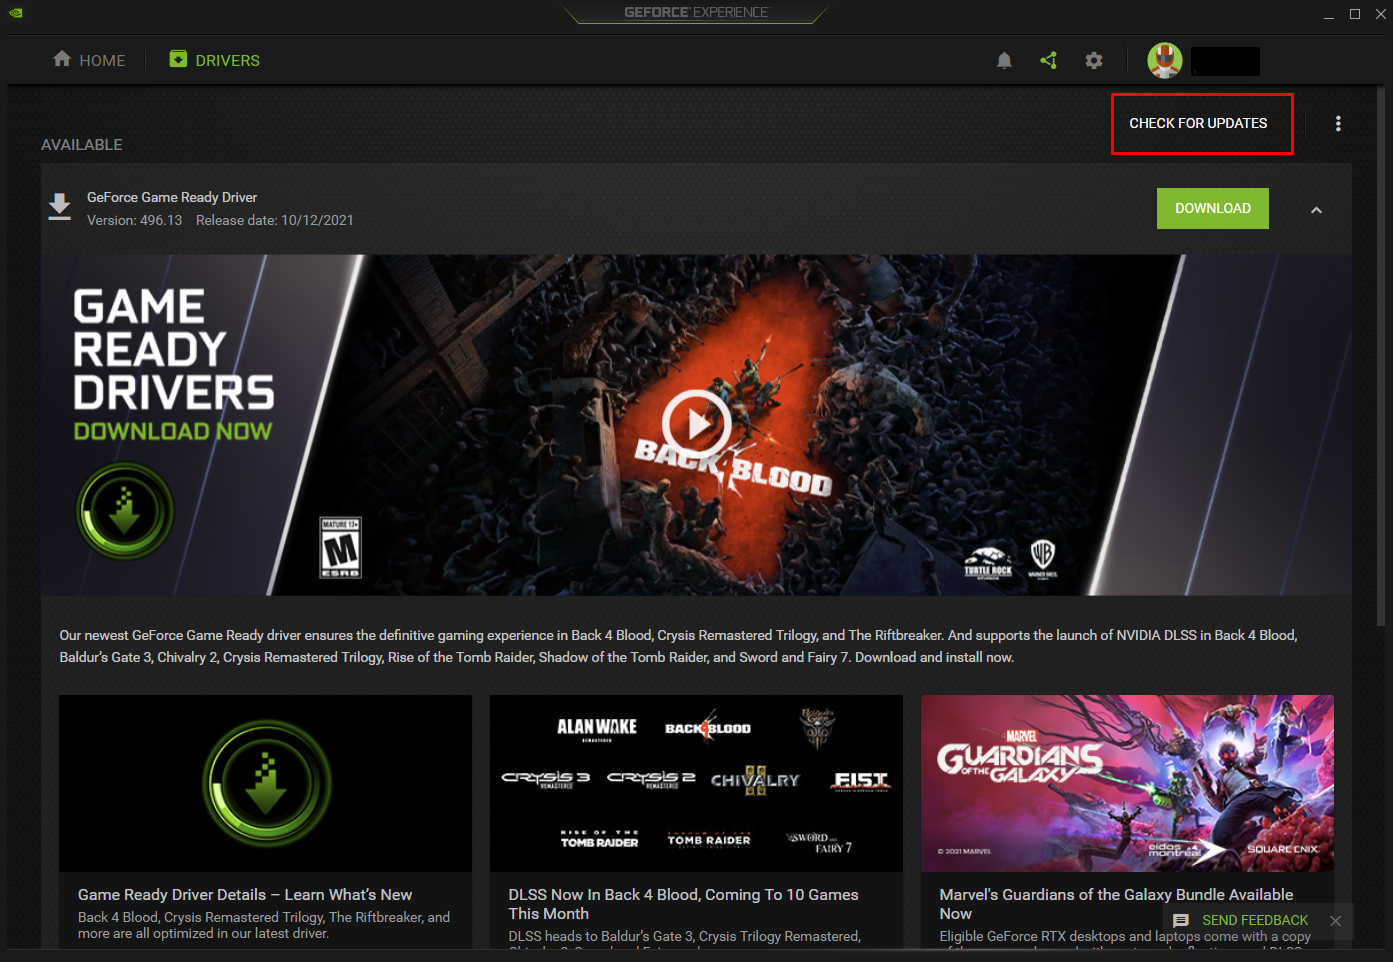
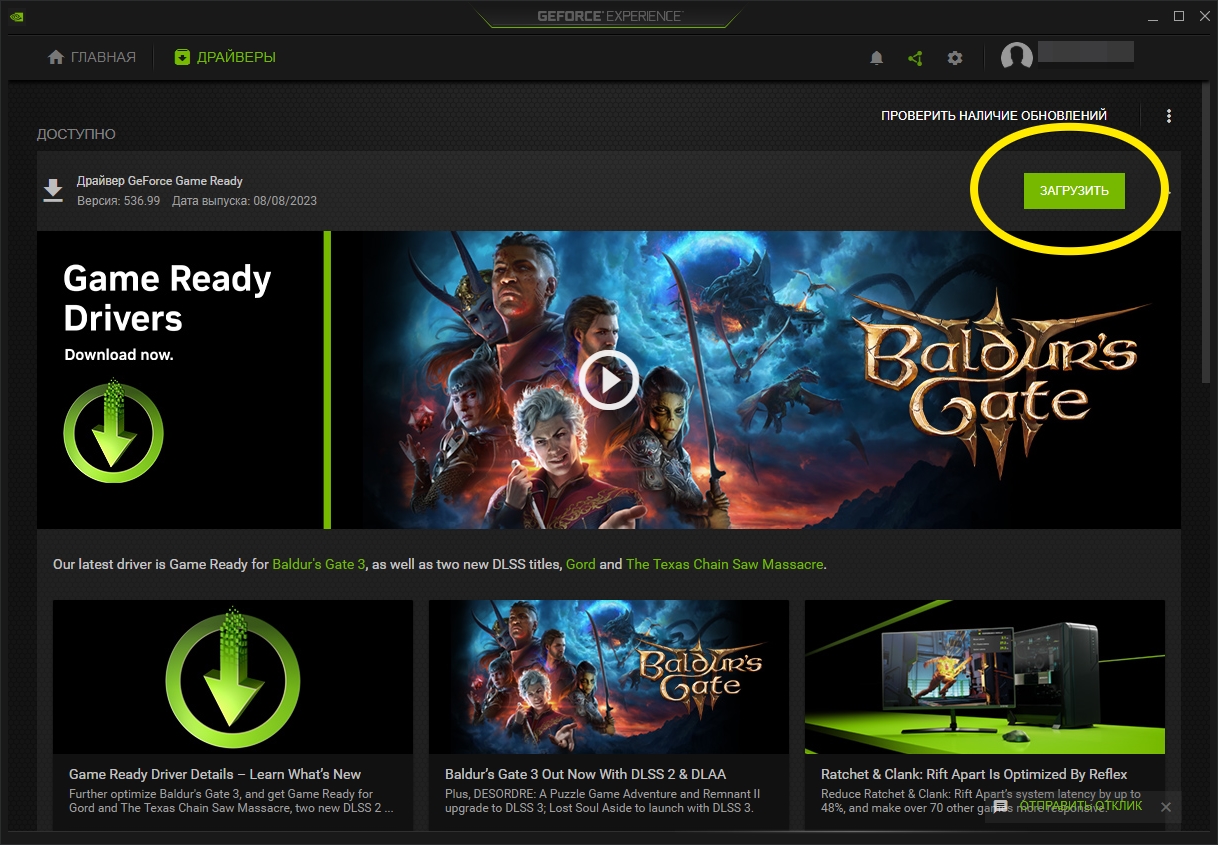
Although you can technically install or update your drivers using NVIDIA’s update software, it’s much simpler to use GeForce Experience.
Don’t worry about your drivers if you still want to uninstall it from your machine. They are available on NVIDIA’s official website and are still fairly easy to download and install.
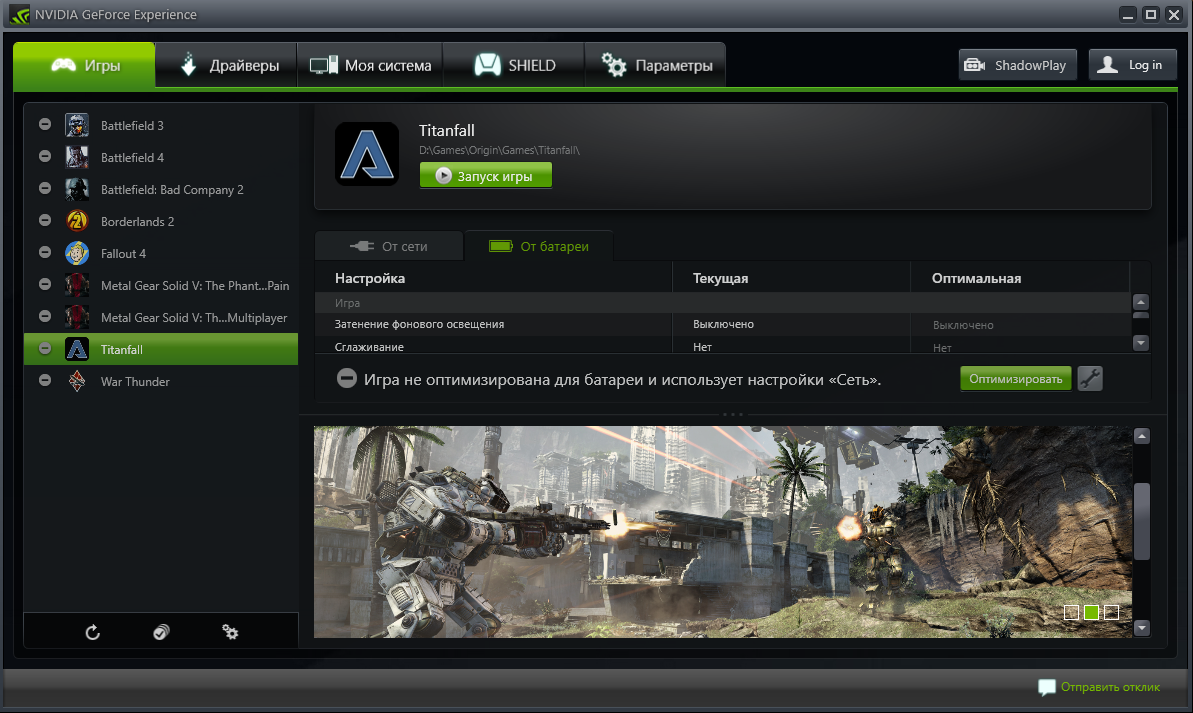
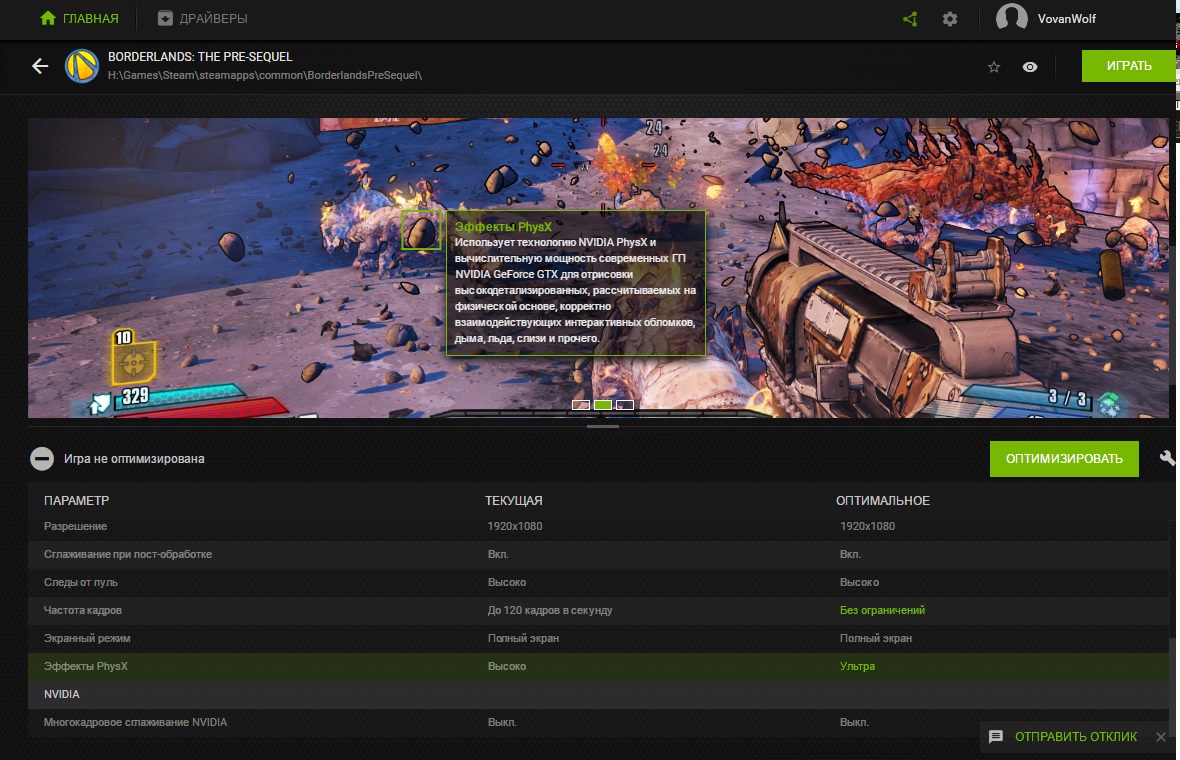
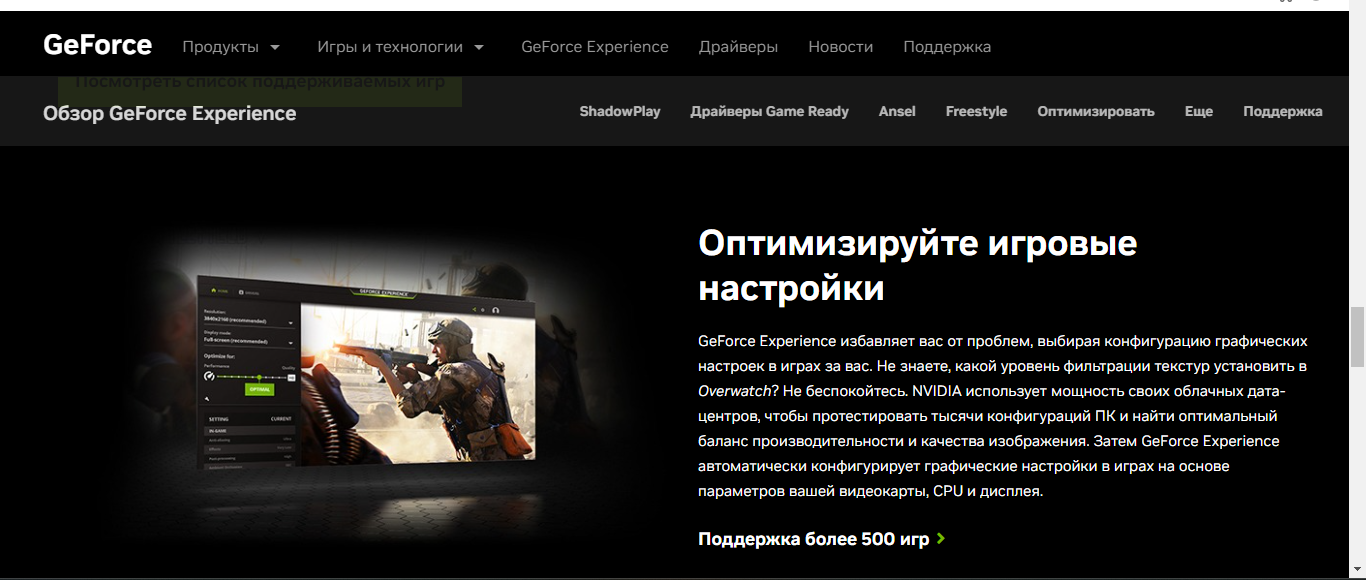
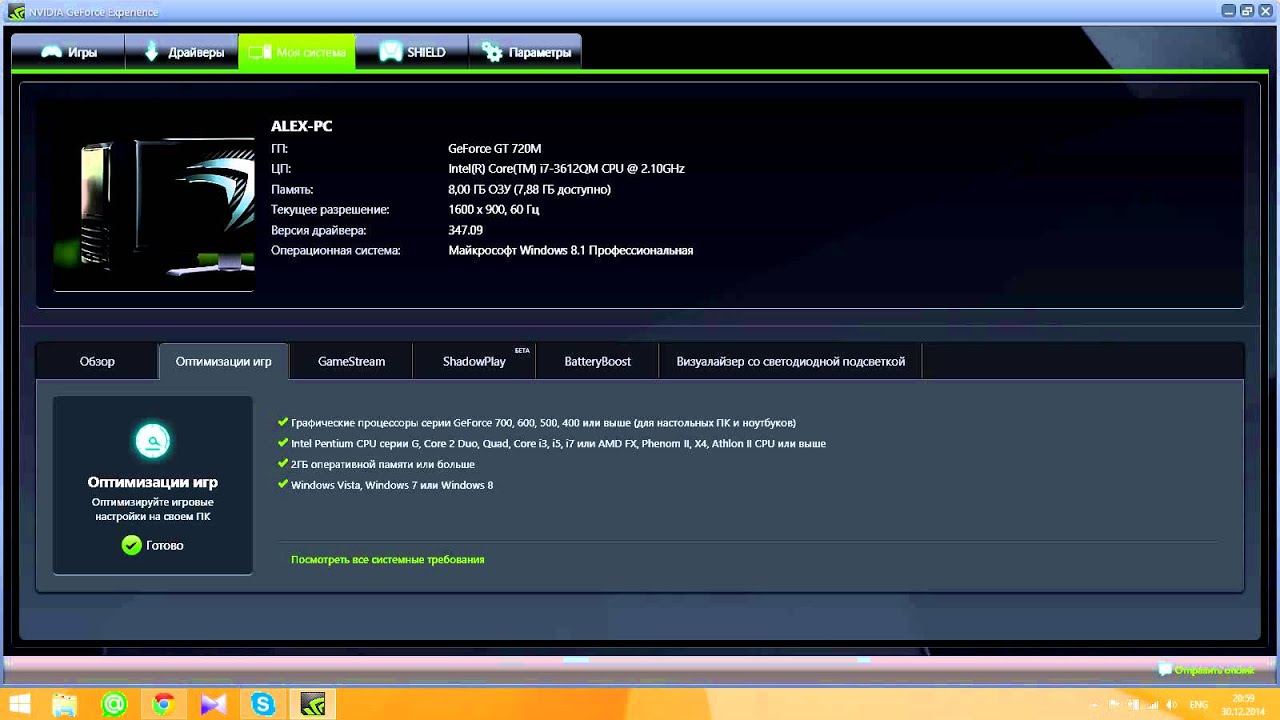
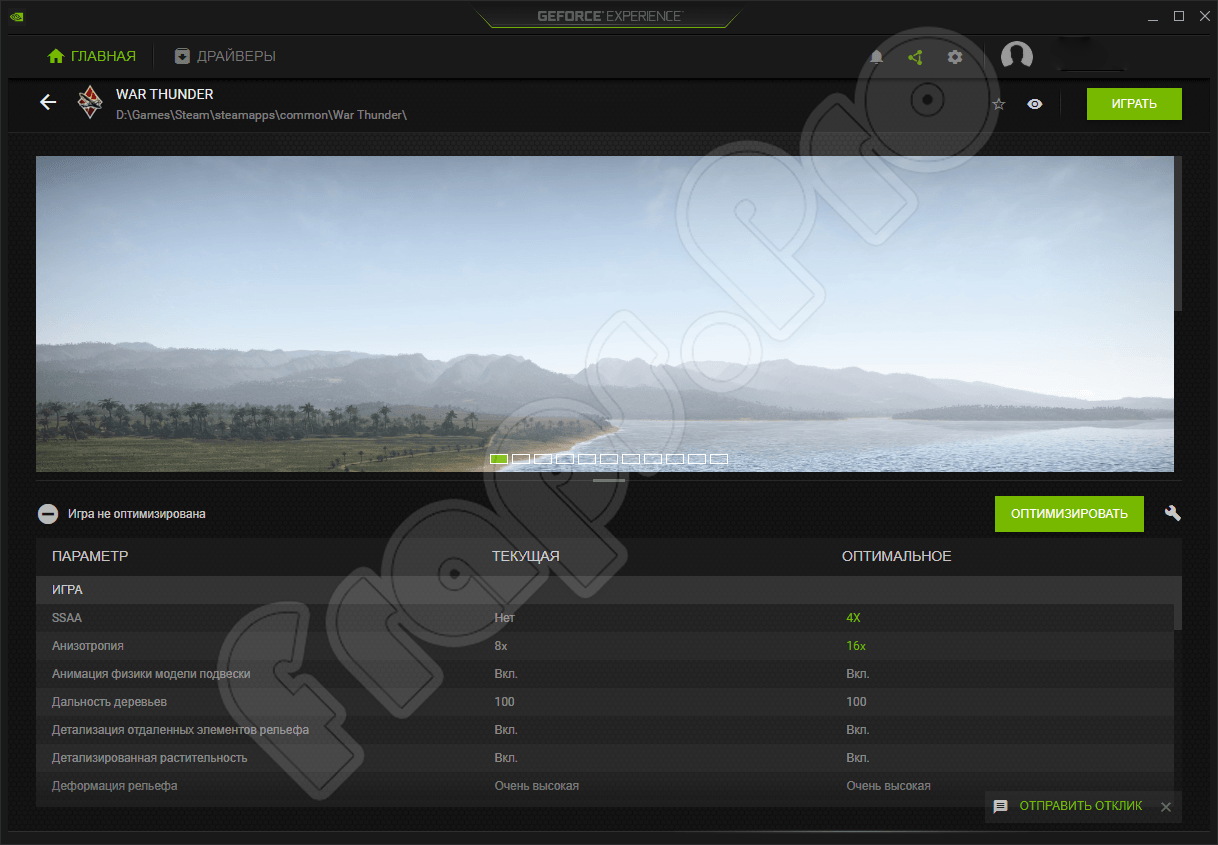
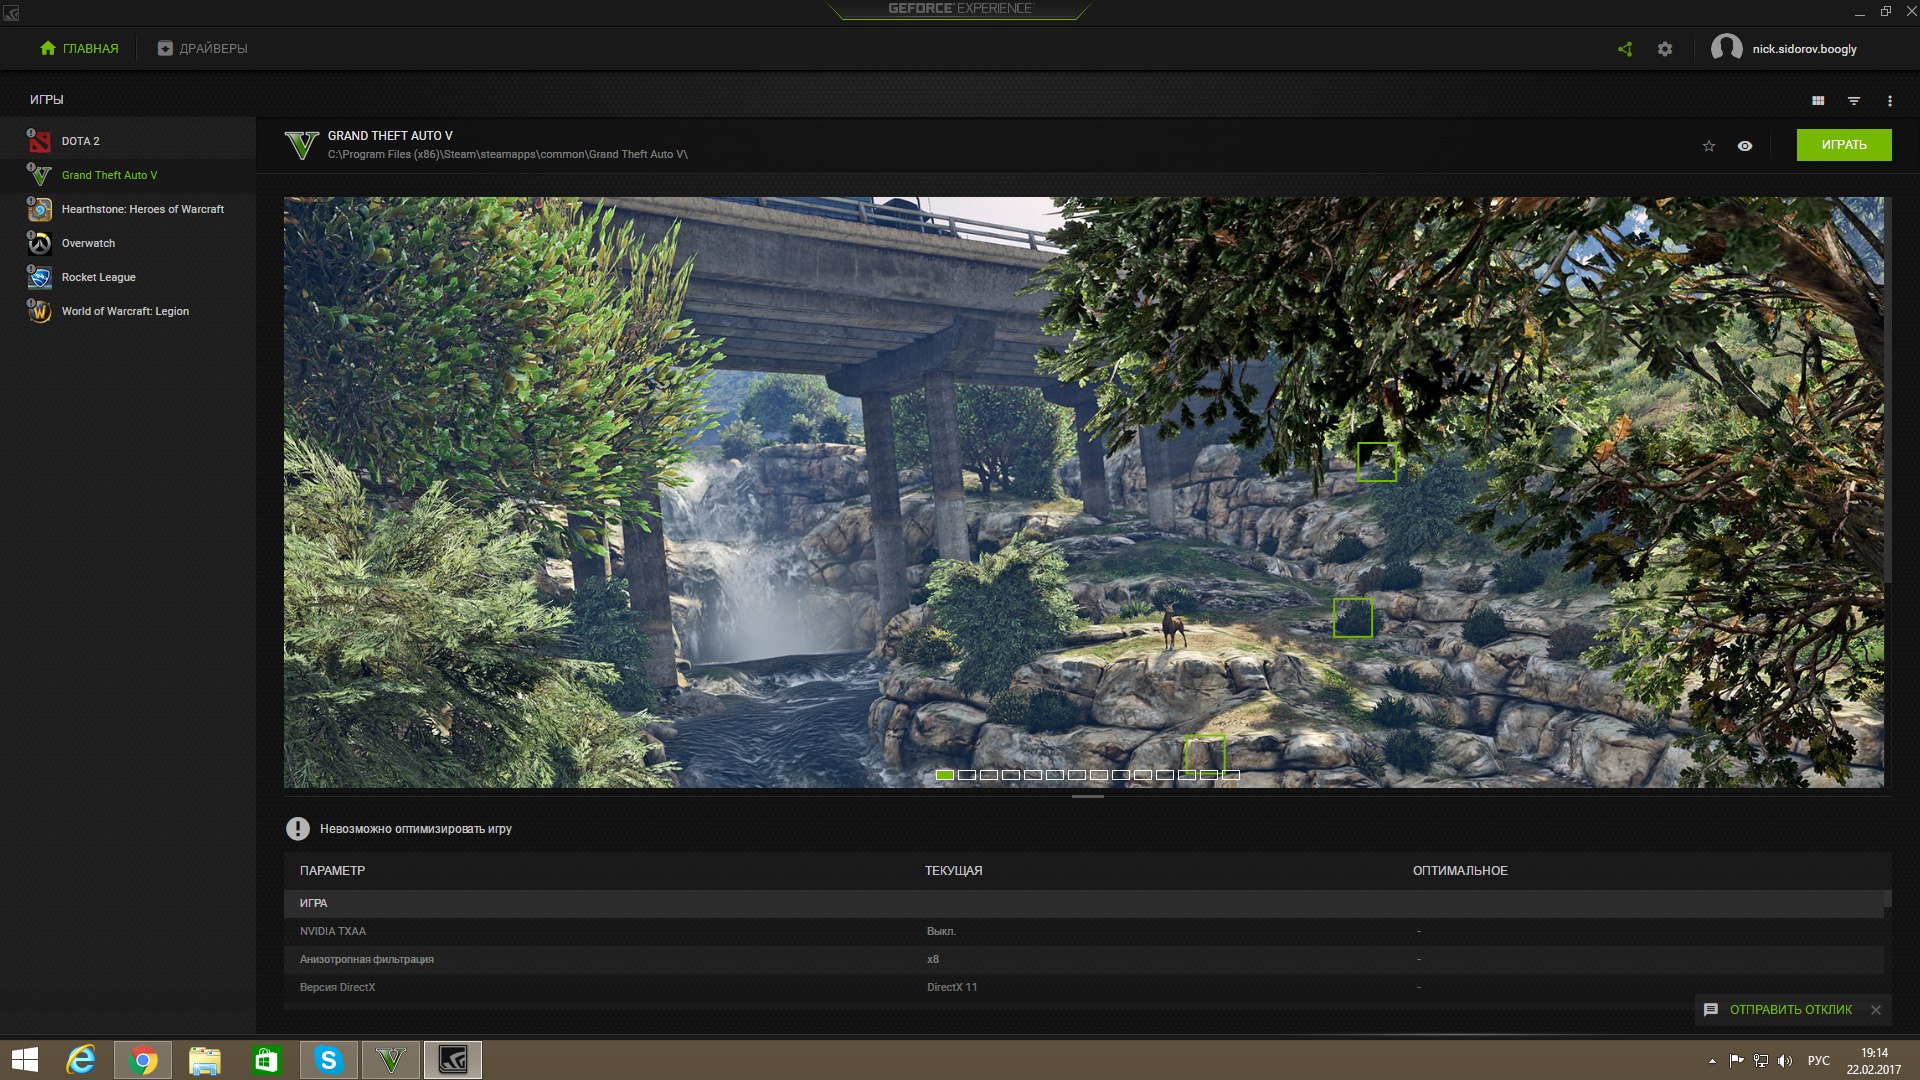
It is crucial to understand that GeForce Experience can do more than just updating drivers. Since it is a tool created by the card manufacturer, it helps simplify optimizing settings for a specific game. This procedure needs minimal effort from you other than clicking the “optimize” button.
Clicking the ‘optimize’ button on the right-hand side will allow GeForce Experience to automatically apply the settings it deems optimal for the best performance.
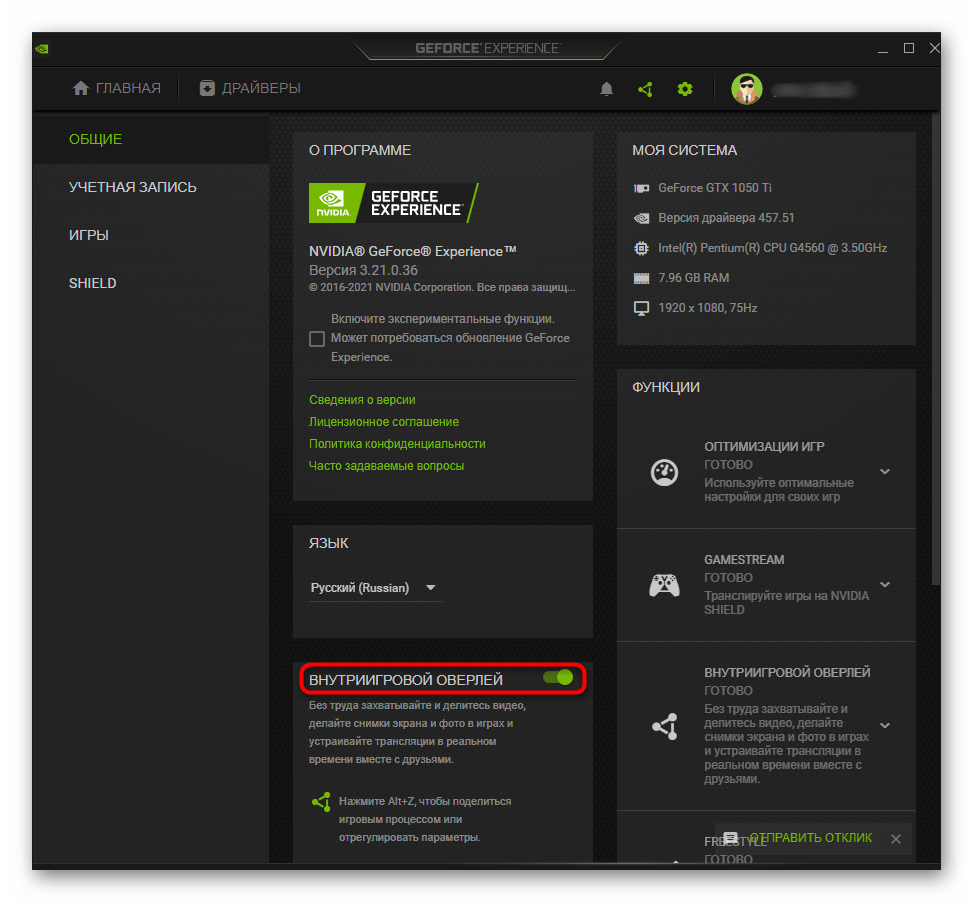
As RTX cards gradually gained momentum, NVIDIA also pushed their efforts to create a better all-around tool for gamers. You can now use GeForce Experience to broadcast and record your gameplay. Although this is less efficient than a more mainstream solution such as OBS Studio, it still does the job.
This particular tool is called NVIDIA Share (formerly ShadowPlay) and allows you to stream and record without needing to download additional software. However, the downside of NVIDIA Share is that it causes a frame rate drop of around 5-10%. Although this is expected, it’s hard to justify when tools such as the aforementioned OBS Studio have successfully managed to overcome this issue.
It would be unfair not to mention NVIDIA’s efforts to improve. With the release of the RTX 3000 series, they have advanced leaps and bounds from their previous broadcasting solution.
Another really cool feature is the ability to apply filters to your in-game screenshots. This might seem odd to mention, but these filters are meant to take extremely high-resolution pictures and turn your screenshots into HDR-quality images.
Again, we need to emphasize the best use and strongest argument to keep GeForce Experience. The greatest benefit is that, because NVIDIA is a market-leader brand, game companies will often work directly with NVIDIA to better optimize their video settings.
There will often be a need for a new driver, and GeForce Experience allows you to immediately and effortlessly download any new drivers as they are released.
However, if you’re still unconvinced and are determined to uninstall GeForce Experience, you’re in luck because the procedure is rather straightforward. The good news is that there is no need to remove anything else, and no preparation is required to uninstall GeForce Experience.
It is strongly recommended that you do not remove your drivers. Despite this tool serving as an automatic driver updater, you can remove it without touching the drivers themselves, which are needed to run video games or any other complex video output.
Disabling GeForce from Services configuration
This could be the way when you don’t want to uninstall GeForce Experience yet wants to keep it nonfunctional. This step will disable all the drivers associated with the graphics card.
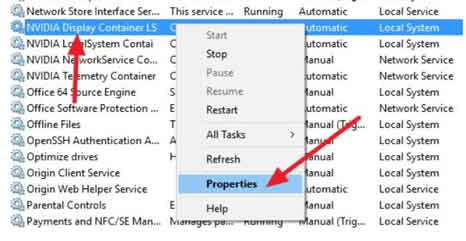
Step 3-Right-click on the same and go to properties
Step 4- Right-click on the same and go to properties
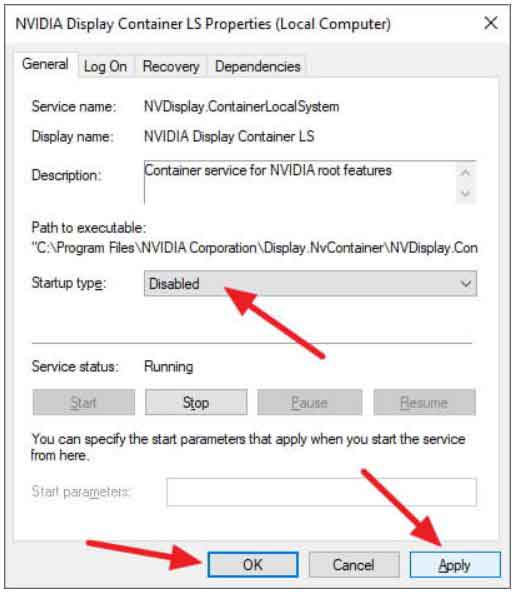
Step 5- Under the General tab, you will see a Startup type. Choose Disabled from the drop-down options.
Step 6-Click Apply and Ok.
Step 7-Restart your machine.
You can always change these settings and can reassess the program whenever you need it.
Nvidia’s control panel offers more customizations to your games for geeks. However, for smooth interface and easy customization, GeForce Experience comes handy. While installing the drivers, choose custom installation. You will be able to untick checkboxes of drivers that you are not going to need, hence, don’t have to install.
Final Verdict!
All the steps mentioned above are revertible. You don’t have to deal with the existence of the Geforce Experience if you do not want it in your machine right now. Otherwise, you can always get the functional GeForce programs back in your machine.
Удаление GeForce Experience на Windows 10
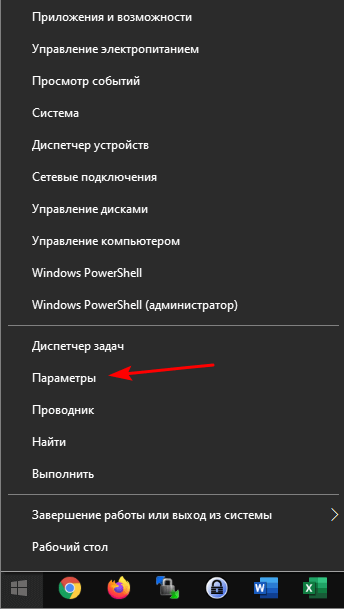
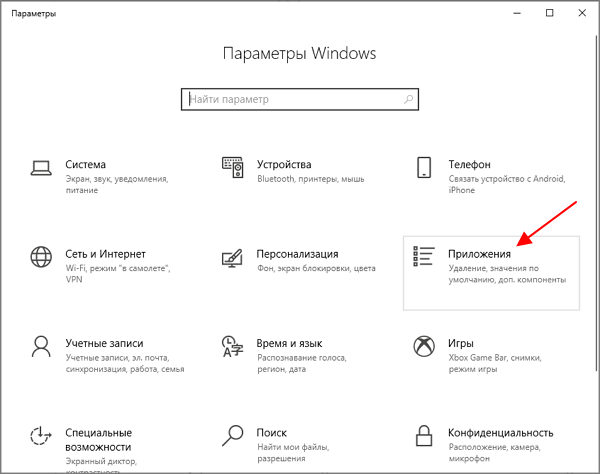
Если вы пользуетесь операционной системой Windows 10, то вы можете удалить GeForce Experience через меню «Параметры». Для этого кликните правой кнопкой мышки по кнопке «Пуск» и откройте «Параметры». Также меню «Параметры» можно открыть с помощью комбинации клавиш Win-i.
После этого, в окне «Параметры» перейдите в раздел «Приложения».
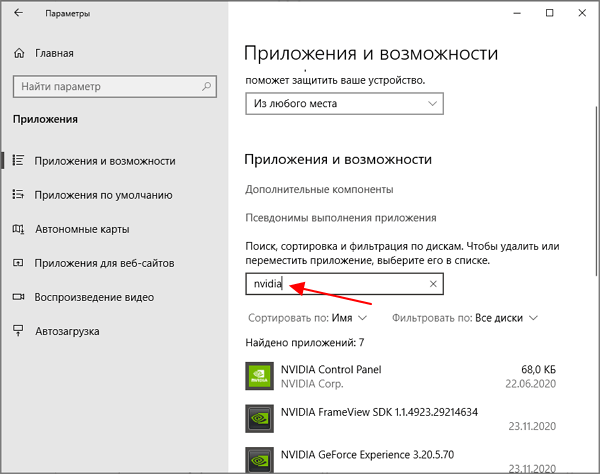
В результате вы попадете на страницу «Приложения и возможности». Здесь нужно пролистать экран вниз и воспользоваться поиском по программам. Введите в поиск слово «nvidia» для того, чтобы найти все программы, связанные с этой компанией.
В списке найденных программ нужно выделить «NVIDIA GeForce Experience» и нажать на кнопку «Удалить».
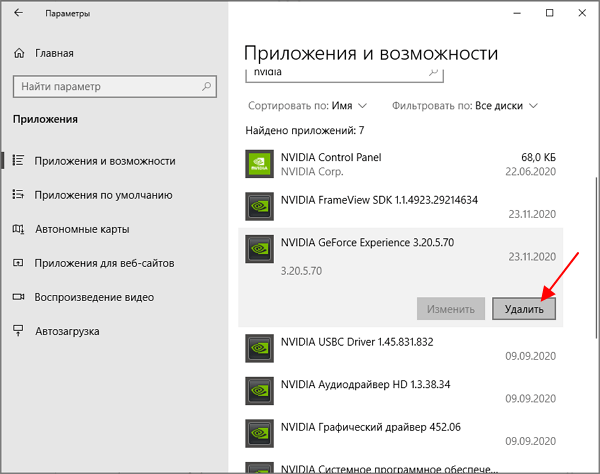
После этого начнется процесс удаления программы. После его завершения перезагрузите компьютер, и программа GeForce Experience будет удалена.
Classic Uninstall
If GeForce Experience works as intended and you are just seeking to remove it from your System, follow these steps.
- Click on the Windows Start menu in the bottom left-hand corner.
- In the search field, type” Add or remove programs” and click on” Best Match” result of the same name.
- Navigate down the list of programs until you find an entry entitled” NVIDIA GeForce Experience XXXXX,” the” X” relating to the particular version or build currently installed on the machine, then click on it.
- An “Uninstall” option will appear below. Click on it to proceed.
- Follow the instructions provided by the uninstall wizard.
Remember to leave all other NVIDIA programs and services untouched as these are linked to drivers and can prevent the card from working at all.
Another method to trigger the uninstall is to:
- Click on the Windows Start menu, then” Settings.”
- Under” Settings,” click on” System,” and finally, “Apps & Features” from the left-hand vertical list.
- Select” NVIDIA GeForce Experience XXXX” from the list on the right-hand side, then click on” Uninstall” just below. Follow the installation wizard.
Uninstalling GeForce Experience
- Go to Control Panel and click Add Or Remove Programs – This is the initial step of removing almost any software on your PC, and this is no exception.
- Find NVIDIA GeForce Experience and click “Uninstall” – Despite there being other NVIDIA software installed on your PC, you will only need to click this one. Afterward, you will be prompted to confirm your decision.
- Click “Close”, and you’re done – It’s that easy.
It’s important to note that you will still see an NVIDIA icon on the taskbar. Don’t worry; this isn’t GeForce Experience but rather NVIDIA Control Panel. This is another tool that helps you improve the performance of your GPU, although it is quite rudimentary.
Fun fact: you can choose which vertical sync setting you wish to use. Hint: don’t go with VSync unless you have no other alternative.
Finally, if you have changed your mind and want to reinstall GeForce Experience, you can download it from NVIDIA’s official site and then follow the easy installation process.
Как полностью удалить NVIDIA GeForce Experience с компьютера или ноутбука
Для удаления программы с компьютера можно использовать стандартные средства Windows 10, 8.1 или Windows 7, а затем, при необходимости удалить оставшиеся папки программы (вместо способа, описанного далее, вы можете использовать специальные программы-деинсталляторы).
Шаги, необходимые для удаления выглядят следующим образом:
- Откройте Панель управления (в Windows 10 для этого можно использовать поиск в панели задач) и перейдите в пункт «Программы и компоненты» или «Удаление программы».
- В списке установленных программ найдите NVIDIA GeForce Experience и нажмите «Удалить/Изменить».
- Подтвердите удаление программы.
- Некоторые остатки программы можно удалить в папках C:Users (Пользователи)имя_пользователяAppDataLocalNVIDIA Corporation и C:Program Files (x86)NVIDIA Corporation, но это не всегда может быть безопасно, так как не все они связаны именно с GeForce Experience (кроме одноименной папки в AppData), некоторые имеют отношение к другим компонентам драйверов NVIDIA.
- Перезагрузите компьютер.
На этом NVIDIA GeForce Experience будет полностью удалена с вашего компьютера.
How to uninstall GeForce Experience
Here are a few methods that you can use to uninstall GeForce Experience. You can always use another method if any particular method doesn’t work for you.
Uninstall GeForce Experience via Control Panel
You can uninstall GeForce Experience from your system by visiting the Control Panel page. Here is what you do.
- Click the start button and type in Control Panel
- Once the Control Panel window opens, select Uninstall Programs.
- Now, browse through the list of installed programs and select the GeForce Experience software.
- Right Click GeForce Experience and select Uninstall.
- You should now be able to uninstall GeForce Experience from your system.
Uninstall GeForce Experience via Apps and Features
This method functions exactly like the one above and can be used to uninstall GeForce Experience
- Click the Start button and type in Add or Remove Programs
- Hit enter on the first result that appears.
- Now, browse through the list of installed programs and select the GeForce Experience software.
- Right Click GeForce Experience and select Uninstall.
- You should now be able to uninstall GeForce Experience from your system
Uninstall from the installed directory
Sometimes, there could be issues with GeForce Experience and one way to remove it from your system is by heading over to the folder where the GeForce Experience software was installed,
- Head over to C:\Program Files (x86)\NVIDIA Corporation. Here the letter C can be replaced with the letter of the drive to which GeForce Experience has been installed.
- Click on the Uninstall.exe file to remove the Program.
Uninstall via System Restore
You can this method to uninstall GeForce Experience but do keep in mind that when you uninstall the program using this method you might lose some data that you might have saved or created after installing GeForce Experience.
- Open the Start Menu and type in Control Panel. Hit Enter to open the desktop Control Panel app.
- In the search bar at the right, type in Recovery.
- Select the first result that says Recovery
- Now, click on Open System Restore
- Click on Choose a different restore point and hit Next,
- It will now show you a list of programs that you have installed along with the time and date of installation.
- When you find the GeForce Experience installation details, select and click Next.
- Now click on Finish to let the system begin it restore to an earlier point of time. The system might restart once and it should be all done.
Do note that if you don’t see GeForce Experience, then you won’t be able to use this method as the system didn’t create a restore point before installing GeForce Experience. That is why it is best to manually create a restore point just in case you wish to remove a program at a later time. Sometimes none of the methods might work just fine, in that case, you can simply delete the folder from its directory, reinstall GeForce Experience and then give it an uninstall, this should work fine and you should have no issues in removing it.
Conclusion
So, there you go, 4 easy ways that you can use to uninstall GeForce Experience from your system. Worried about how to install the attest drivers for your Nvidia GPU? Well, you can always just download the driver update from the Nvidia website and install it without needing to worry about anything including GeForce Experience.
You May Also Like – GeForce Now Games List
Still have any doubts? Leave a comment in the comment section below. Also, share this article with your friends.
More Related Articles:
- List of Games that are Compatible with M1 Macs
- Here’s the List of Games available in Apple Arcade
- List of Games available in Amazon Luna
- How to Remotely Control iPhone Camera without touching it